Shortcuts on iOS and Mac
You can use Shortcuts to create tasks on your Apple devices or set up other helpful automations to streamline your workflow.
Upon setting up a shortcut, you can trigger it using Spotlight on your Mac. On iOS, shortcuts can be pinned to your home screen as widgets, or run via Siri on your Apple Watch or HomePod.
The following guide walks you through setting up a simple shortcut for creating a task. You can follow it as-is, or treat it as a hands-on way to learn and then start building your own creative automations – for tracking habits, adding notes, journal entries, or doing something else.
Set up using our pre-made template
We already created a shortcut template, so you don’t need to go through the tedious process of setting up the shortcut yourself. If you still want to create the shortcut manually, follow the tutorial in the next section.
To get started with our shortcut template, download the shortcut file by clicking here on your iOS or macOS device and install the shortcut by opening the file. Once installed, we now have to modify the shortcut to enter a few things specific to your Lunatask account.
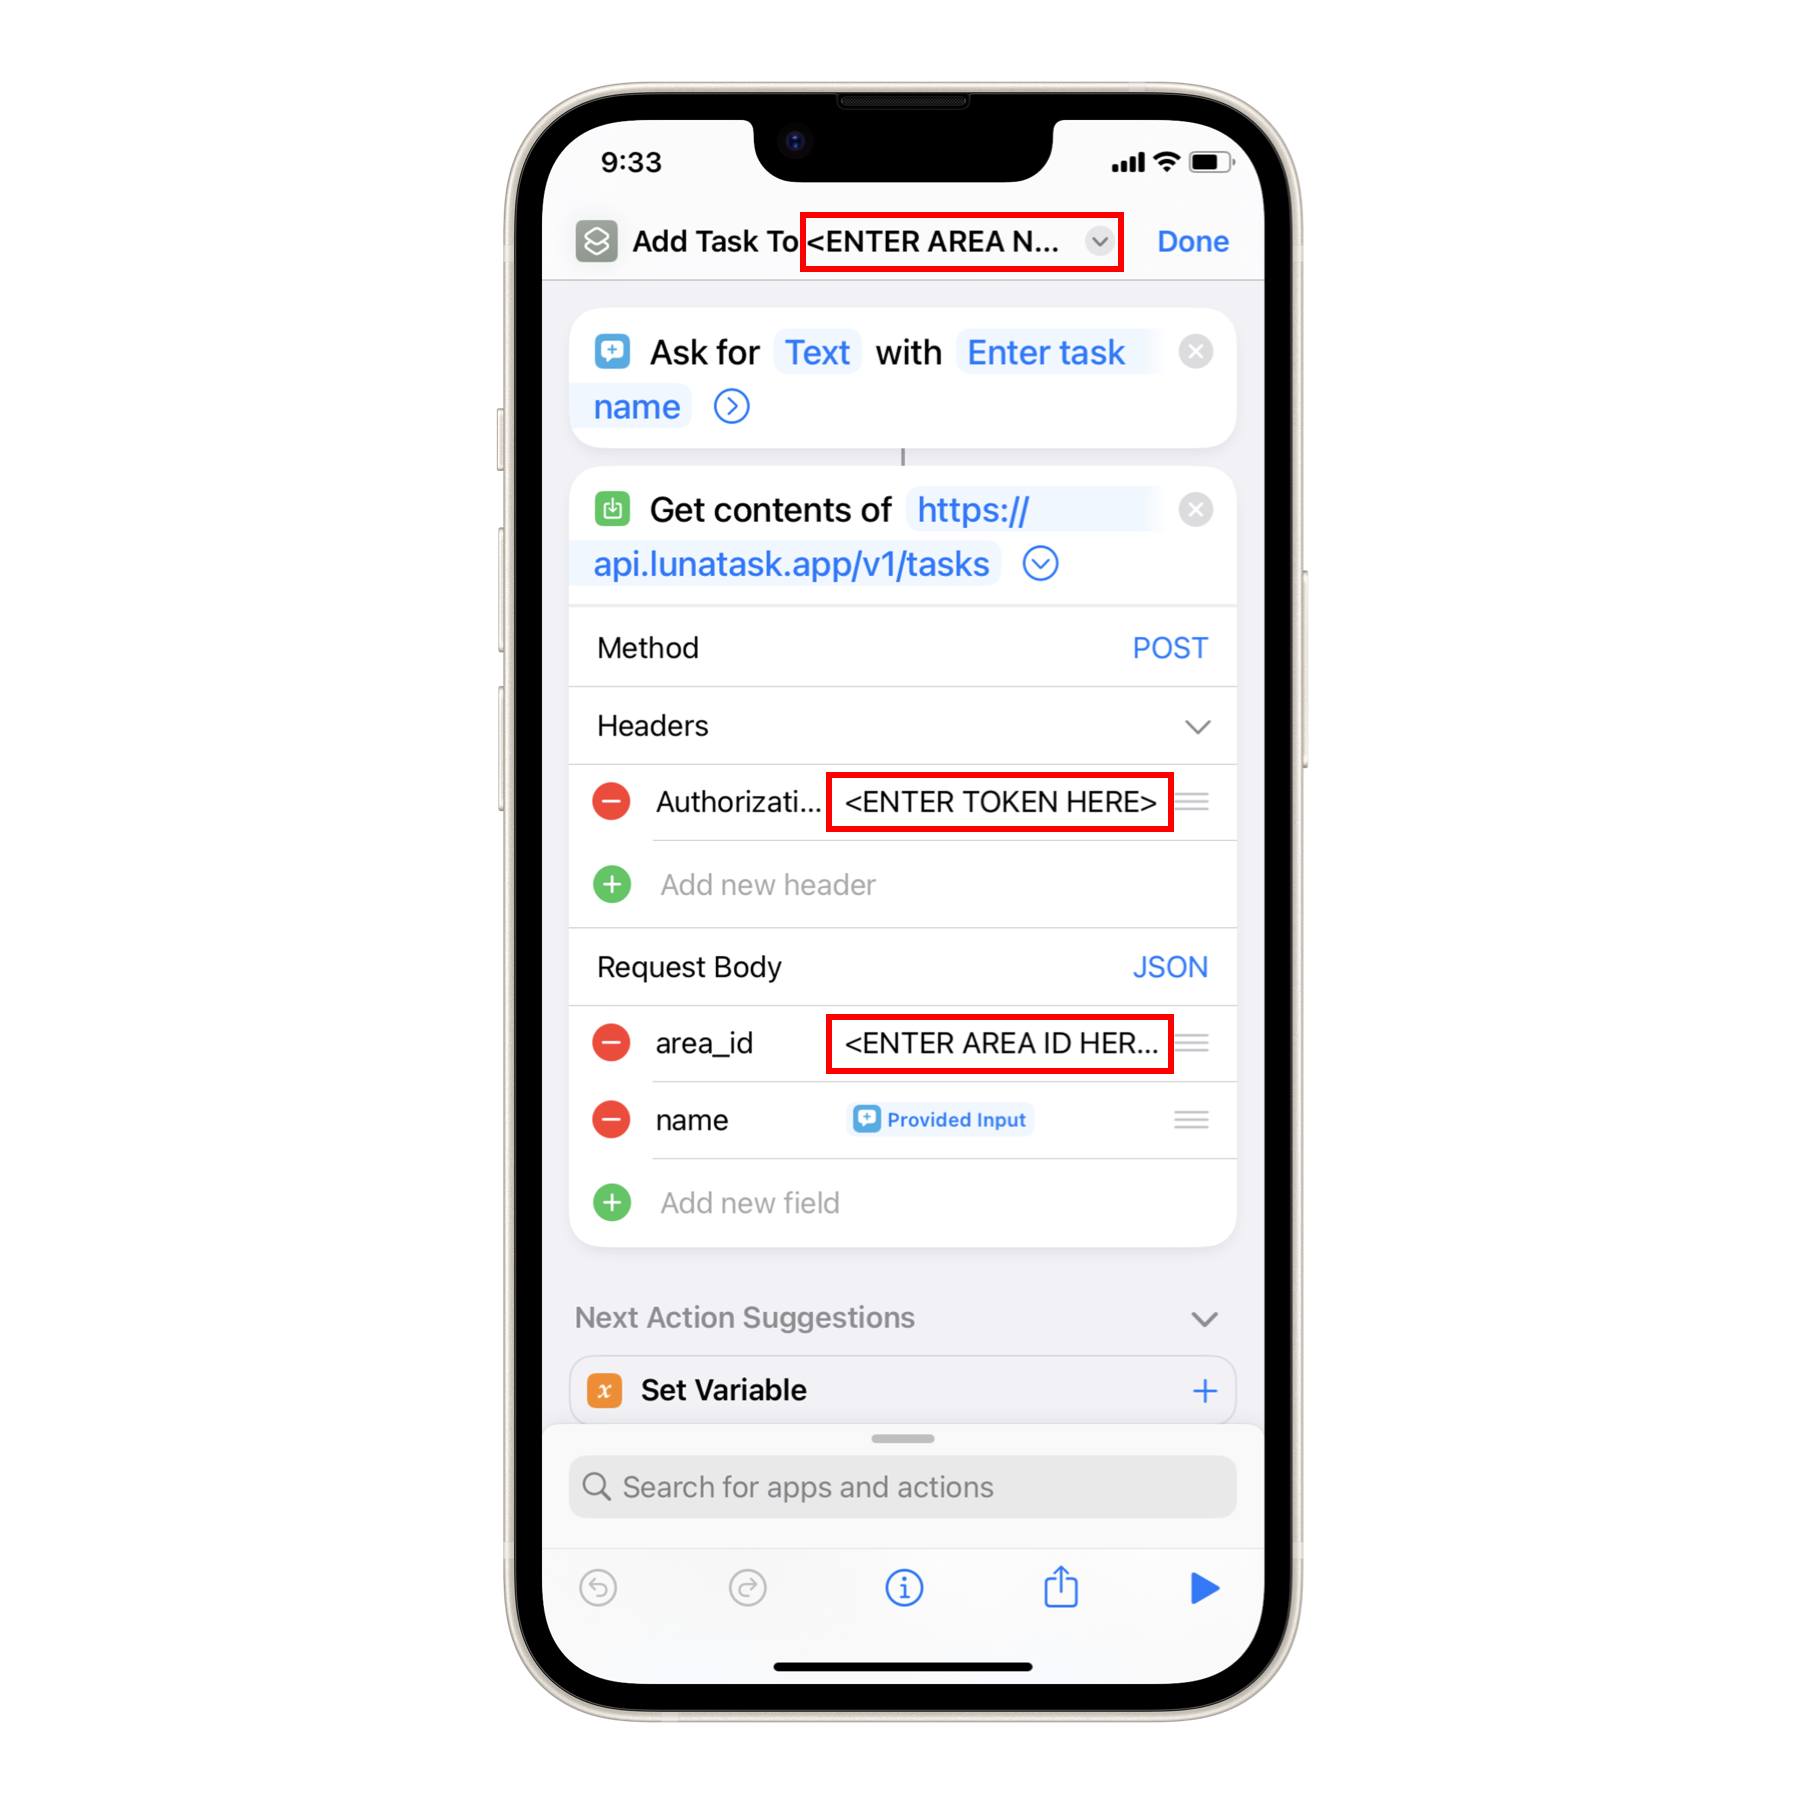
First, rename the shortcut and replace <ENTER AREA NAME HERE> placeholder in the shortcut’s name with the name of the area of life where you want new tasks to be created.
If you wish to add tasks to different areas at various times, you may also consider using an Inbox approach – create a separate “Inbox” area where incoming tasks would collect to be sorted later.
You can name the shortcut however you want. The name is there for you to know what the shortcut does. You can remove the placeholder and name the shortcut just “Add Task” if you want.
Now, replace <ENTER TOKEN HERE> placeholder with a real token as the second step.
Create an access token Settings → Access tokens in our desktop app, name it “Shortcuts”, and press “Copy to clipboard”. Then, paste the access token as the value for “Authorization” key.
Thanks to Apple’s Universal Clipboard feature, you can paste what you copied into the clipboard on Mac on your iOS device. This might come handy here.
Lastly, tell Shortcuts in which area of life the task should go in Lunatask. Find and copy Area ID in its settings, and replace <ENTER AREA ID HERE> placeholder with the ID.
Using Area ID instead of area name may be inconvenient, but it's required because the names of your areas are end-to-end encrypted, and Lunatask servers don’t know them. Also, names can change over time.
That’s it. Now, try running the shortcut.
To make it available on Apple Watch, press the info icon in the bottom toolbar and enable “Show on Apple Watch”.
Manually creating a shortcut
In this tutorial, we will manually create a shortcut from scratch on iOS or Mac to add new tasks to your lists.
Get started by opening the Shortcuts app. Usually, the Shortcuts app is already preinstalled on your iOS or macOS device. If not, install it from the App Store.
On main screen listing all available shortcuts, click the add icon in the header to create a new shortcut. Name your shortcut any way you like, and pick an icon for it.
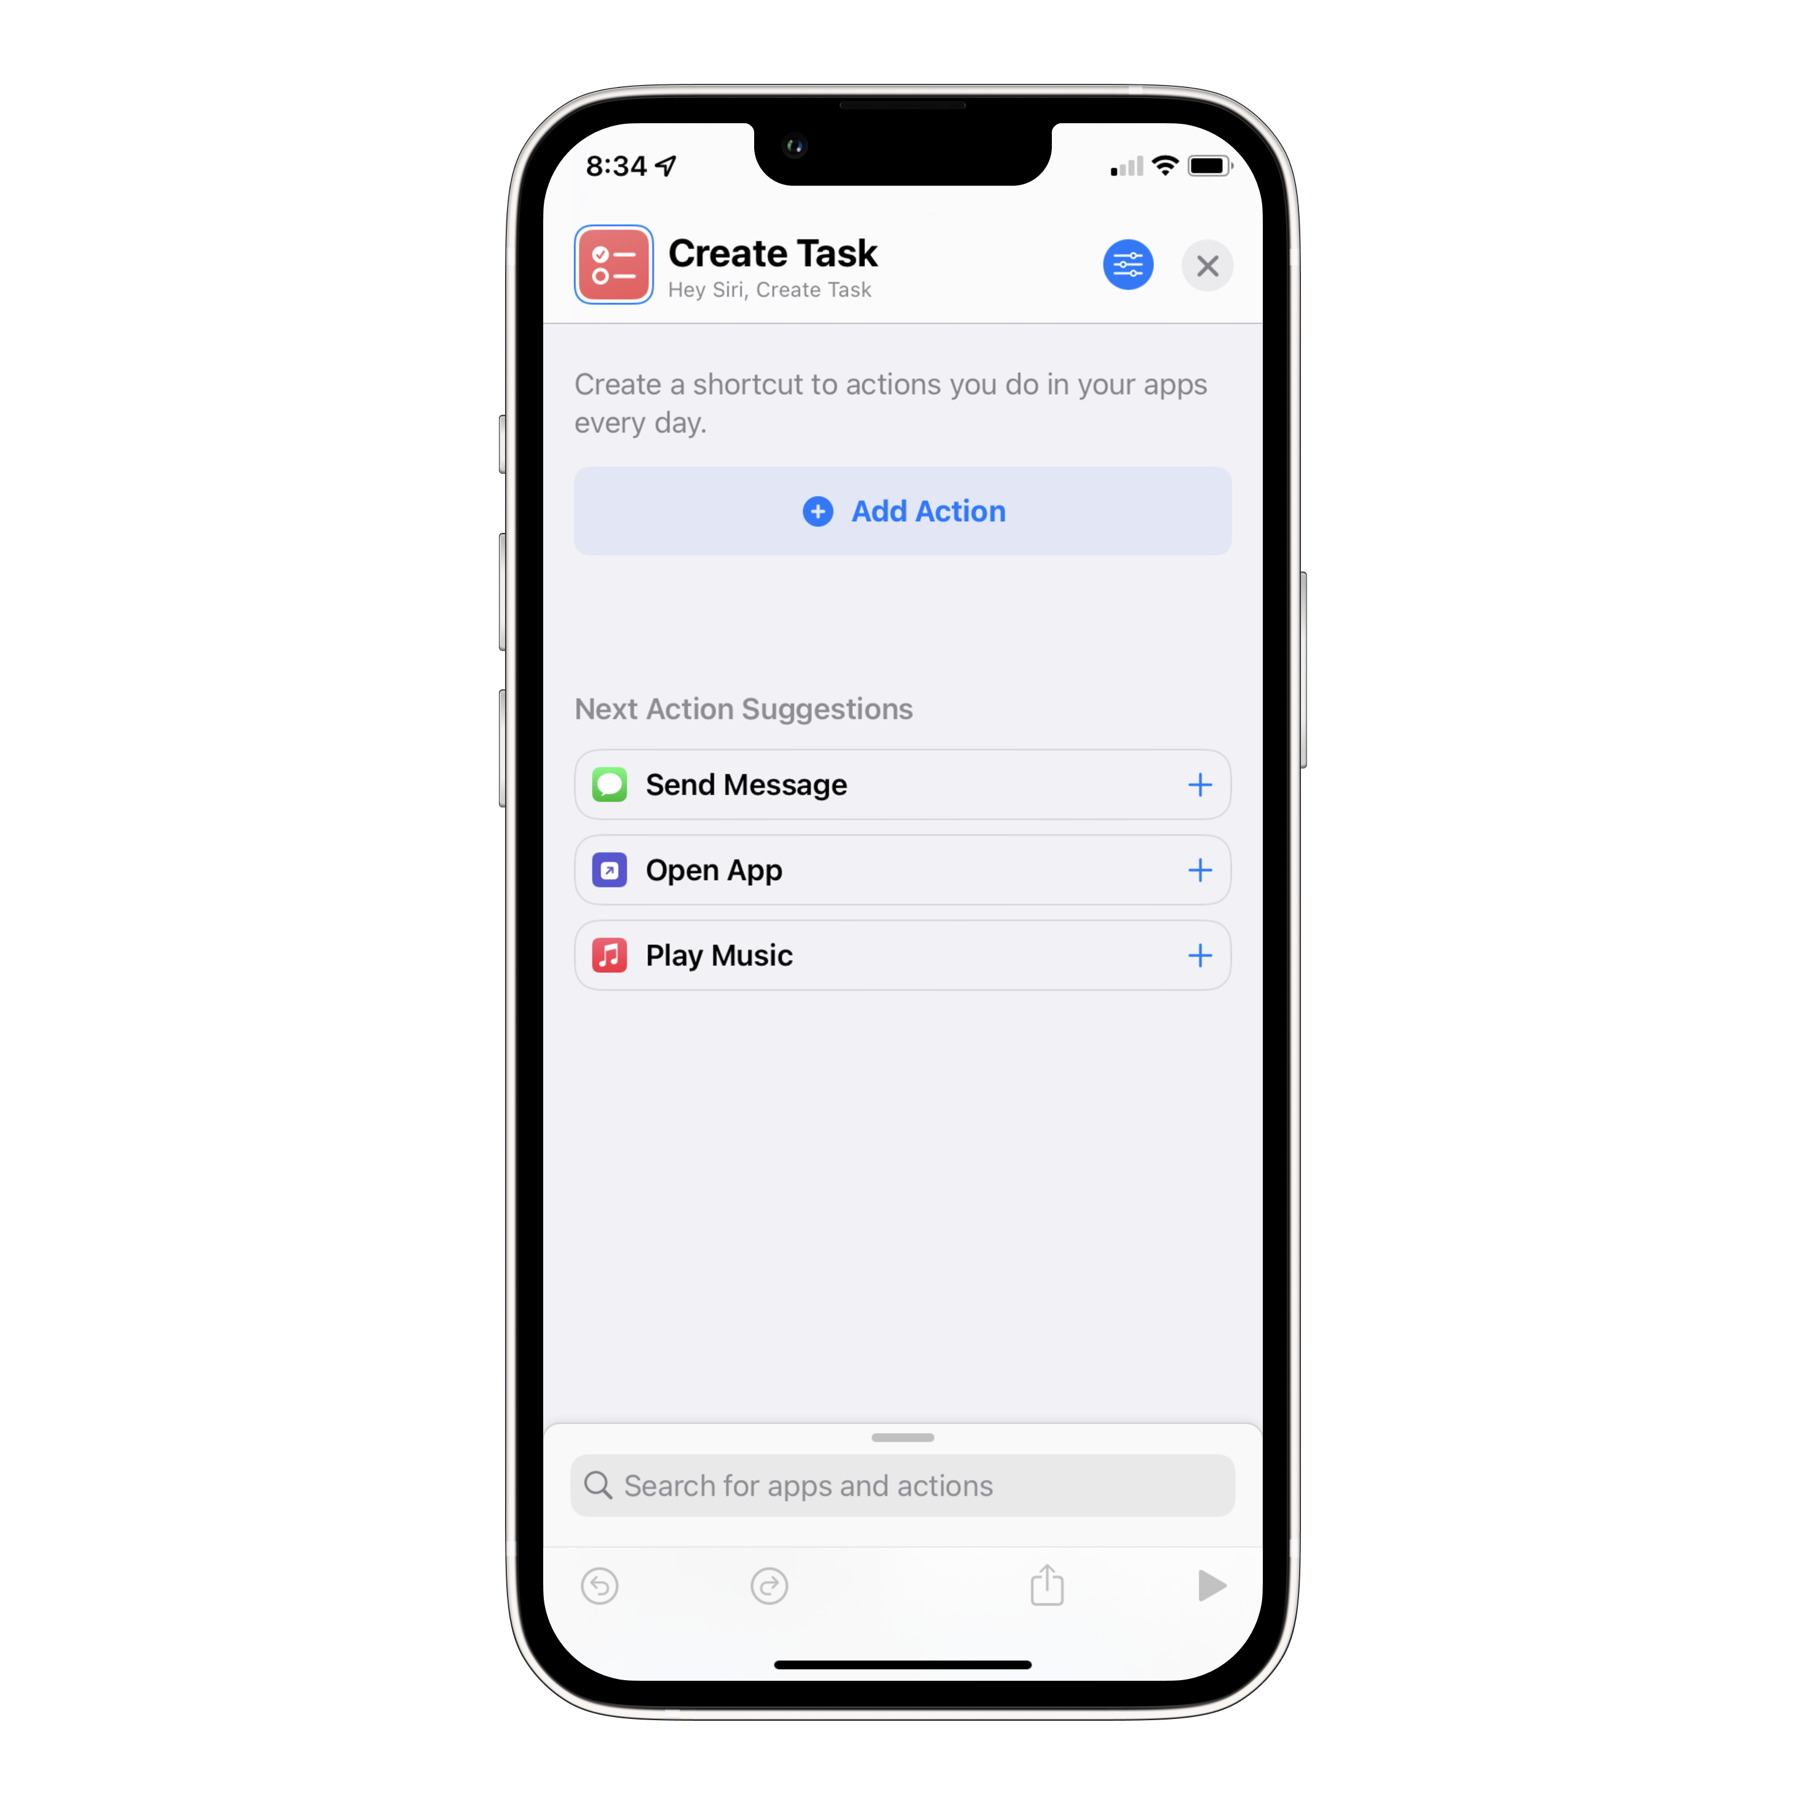
Now, we configure actions. The first action taking place when running the shortcut will prompt you to enter the name of a newly created task. Press “Add Action”, select “Scripting” actions, and find “Ask for Input”. Once added, you can set the prompt (e.g. “Enter task name”).
Instead of “Ask for input”, you can use “Dictate Text”, if you prefer.

Next, we configure another action to send this information into Lunatask. Slide up the list of available “Scripting” actions from the bottom of the screen and press the “X” icon to close “Scripting” section, returning you to the list of all available actions. Select “Web” actions and find “Get Contents of URL”.
Now, we configure where the task should be sent – tell Shortcuts to call Lunatask API. This is be somewhat technical, but following this tutorial exactly will get you there without too much effort.
Fill in https://api.lunatask.app/v1/tasks so the action says “Get contents of https://api.lunatask.app/v1/tasks” instead of “Get contents of Provided Input”.
Press the arrow icon to reveal more details – there, change the method from GET to POST.
Open “Headers” section and press “Add new header”. Into the field for “Key”, type “Authorization”. Into the field named “Text”, paste an access token.
Create an access token Settings → Access tokens in our desktop app, name it “Shortcuts”, and press “Copy to clipboard”.
Thanks to Apple’s Universal Clipboard, you can paste what you copied into the clipboard on Mac on your iOS device – this may come handy here.
Now, paste the access token as the value for “Authorization” key.
Next, tell Shortcuts in which area of life the task should go in Lunatask. Under “Request Body” section, press “Add new field” and select Text type. As “Key”, fill in “area_id”, and as value, fill in Area ID of the area where the task should be created.
If you don’t wish to hardcode a single area in the shortcut, you can add a prompt into your shortcut and select where the task should be created for each of your new tasks. Use Scripting → Choose from List action for that. We won’t cover it here, but once you finish this tutorial, you should know enough about setting up shortcuts to be able to set this up.
Next, add another field and name it “name”. Upon focusing into “Text” field, select “Provided Input” from the toolbar. The shortcut will now look like this:
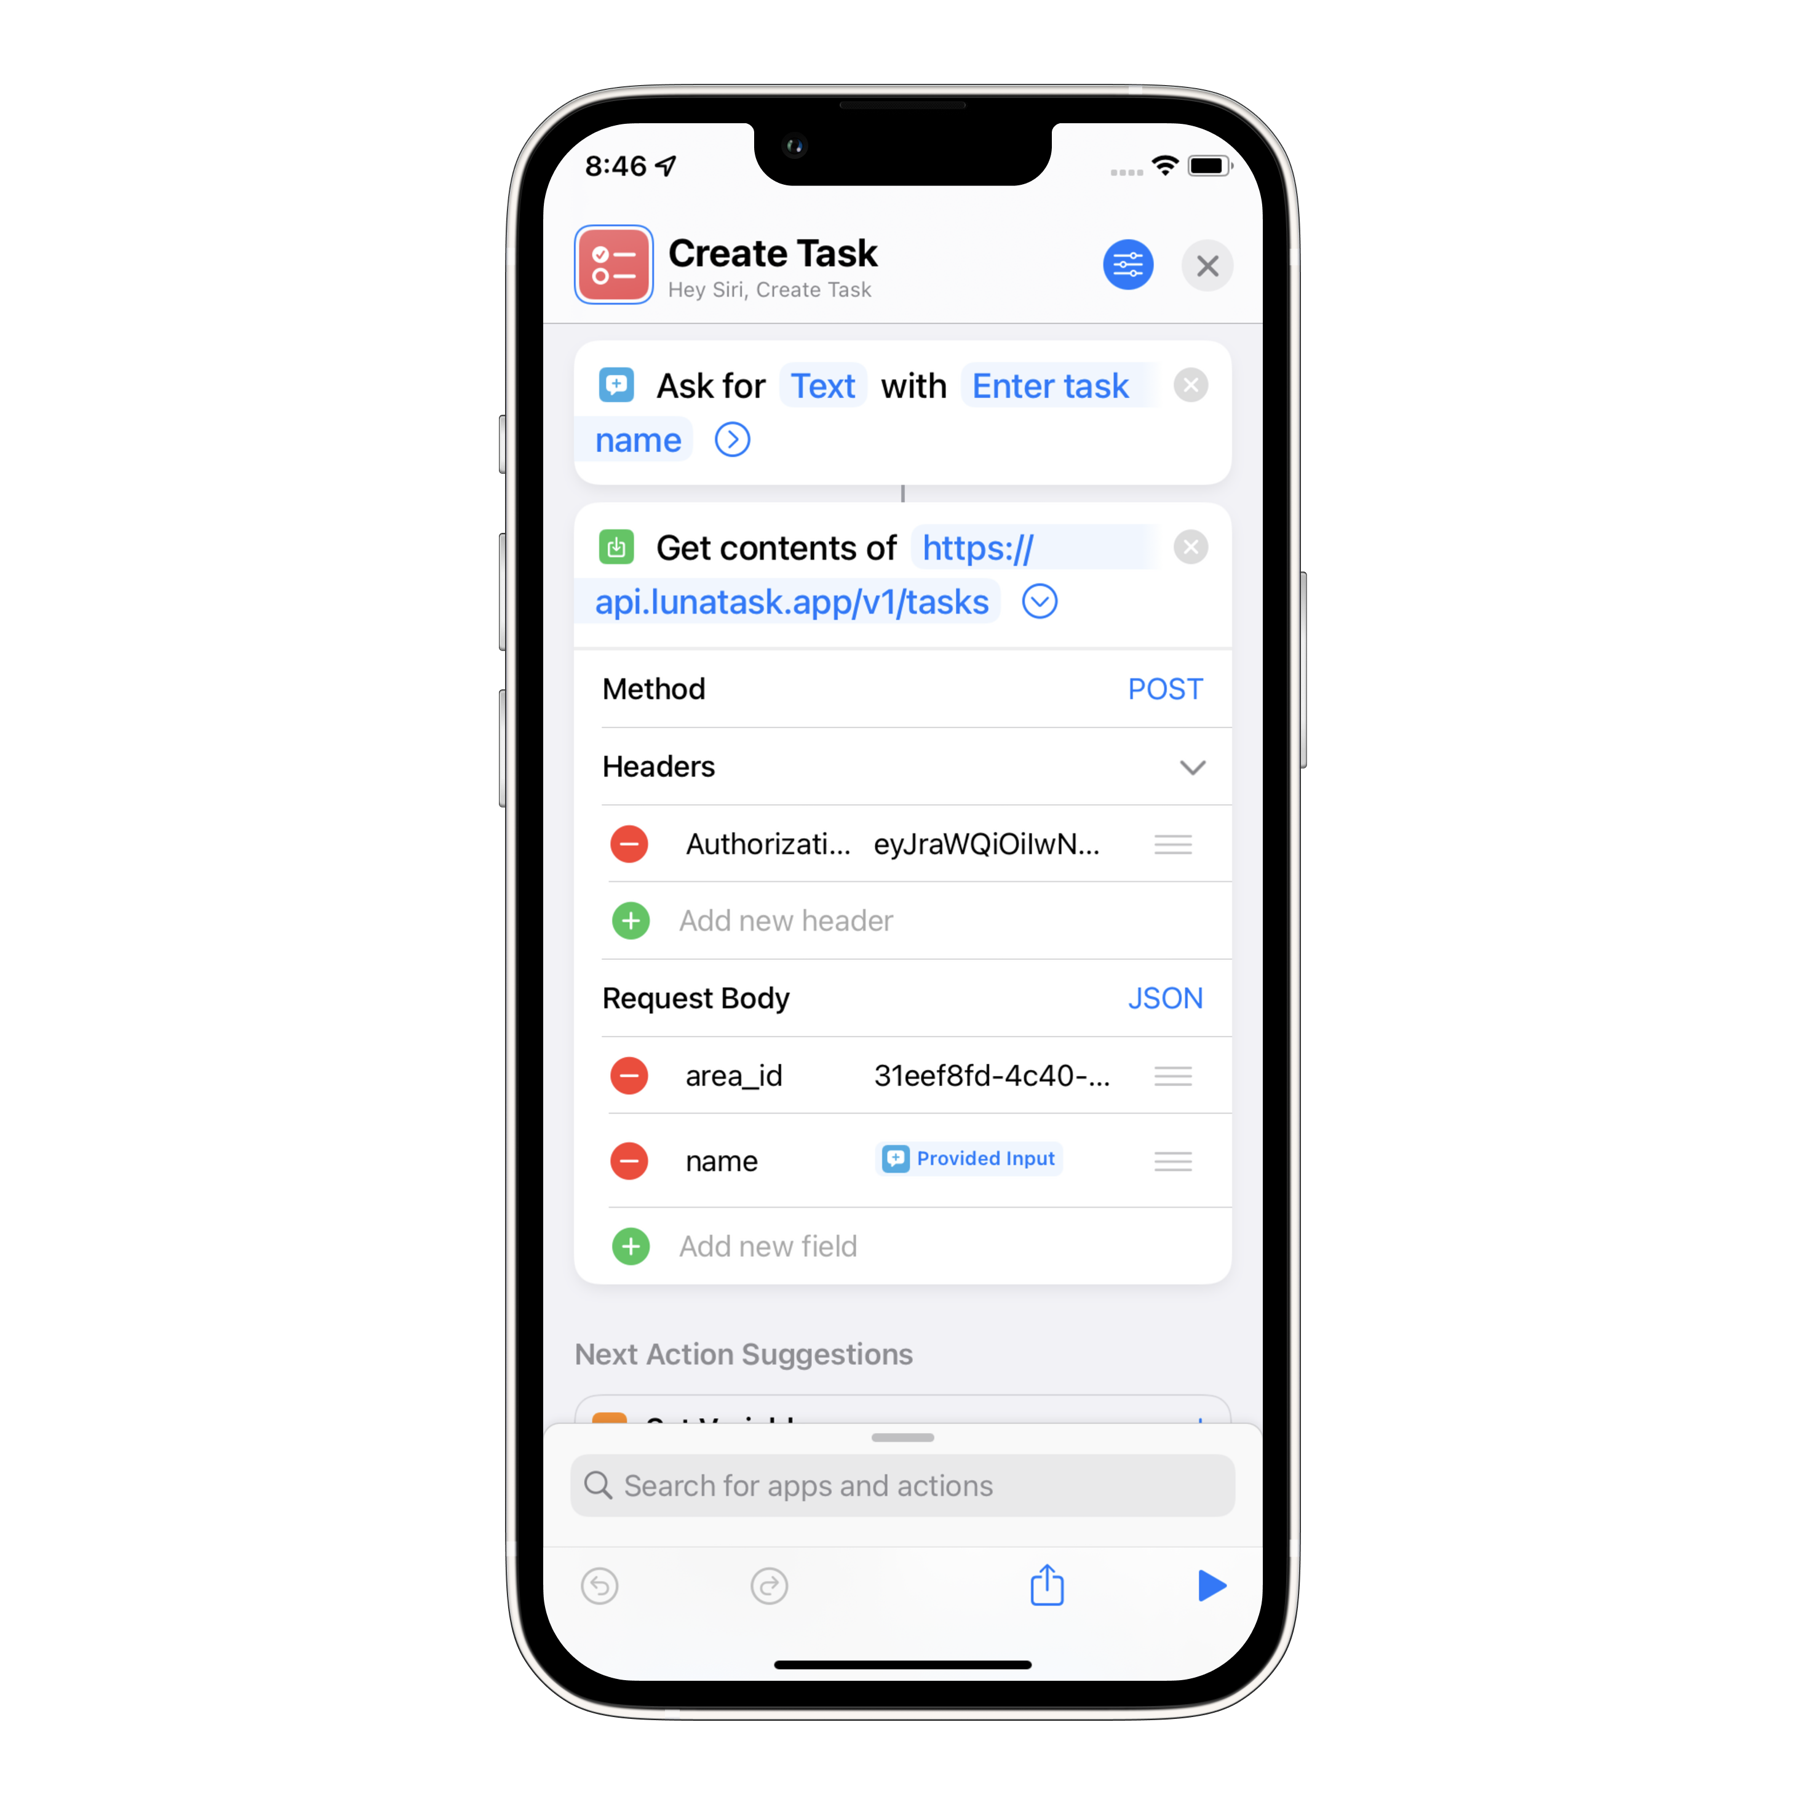
Now, press the play icon in the bottom toolbar to test your shortcut – a popup should appear, prompting you to enter the task name. Upon clicking “Done”, the task should be created in your chosen area in Lunatask.